Concept and Inspiration
A horse clears a fence in one swift movement, but where exactly are its legs halfway through the jump? In the Victorian era, chronophotography helped answer questions like that by capturing separate phases of motion. Researchers used these sequences to study how animals moved, while artists could examine poses that passed too quickly to study in real time. The photographs turned a fleeting leap into something a person could inspect, moment by moment. [1]
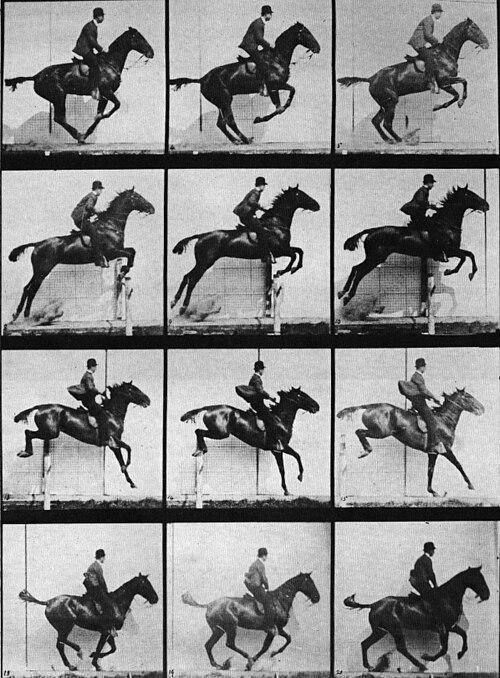
Figure 1. Successive photographs show a horse and rider at different moments of a jump.
Photo: Eadweard Muybridge | publicdomain
Photographer Eadweard Muybridge used multiple cameras to record successive positions of moving animals between 1878 and 1886. His studies also included people in motion, and his later work at the University of Pennsylvania produced an extraordinary collection of more than 100,000 images. A line of pictures could reveal the shape of an entire stride without asking the subject to slow down. Muybridge also developed the zoopraxiscope, which projected painted moving pictures from glass discs. Separate moments could become a moving display again. [2]
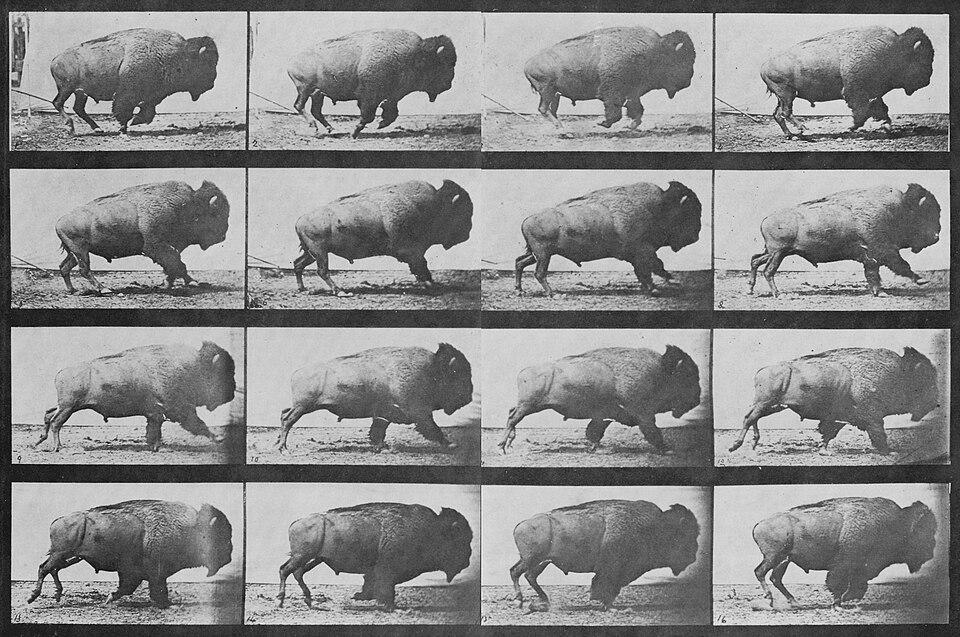
Figure 2. A photographic sequence records successive positions in a bison's movement.
Photo: Eadweard Muybridge | publicdomain
French physiologist Étienne-Jules Marey approached movement through measurement as well as photography. He helped establish graphical ways to display and interpret information from the body, making changing physical events easier to examine. [3] Another way to make fast movement easier to study is the stroboscope. By showing a moving object under repeated flashes, a stroboscope can make a repeated motion seem slower or even still. [4] Both approaches invite a striking thought: the smallest visible instant can tell us something about the movement that comes next.
That next instant matters to the brain, too. A review of visual motion research explains that neural processing takes time and explores how predicting a moving object's position may help compensate for that delay. [5] Other research examines how people estimate where a moving target is while it passes behind an obstruction, including when it might reappear or meet another object. [6] We recognize this everyday challenge whenever we anticipate where something in motion will be a heartbeat from now.
We developed Geometry Dash World at slope3.com as a fast, colorful way to feel the importance of those tiny moments. A small square moves through a violet obstacle course, tilting in the air and leaving bright green flecks behind. Those quick visual traces make each leap easy to follow even as the course moves forward. Our creative idea is simple: turn the act of anticipating motion into a playful challenge, where the next split second deserves your full attention.
Story
In an imagined city called Afterglow, the last working clock hangs above rooftops that never see sunrise. Its hands are driven by a single wandering spark. If that spark fades, every streetlamp will dim and the city will lose the rhythm that keeps its nights moving. A small square courier named Pip volunteers to carry the light toward a distant beacon before the clock falls silent.
Pip's route runs over green-edged ledges, beneath heavy purple ceilings, and past crystalline spikes that catch the last scraps of light. Cyan signs flicker in the distance like messages left by travelers who crossed before. The courier cannot stop the road from rolling onward. Each leap must happen in one precise instant, with the spark drawing a brief bright trail through the dark. The city can see where Pip has been, but the danger lies just ahead.
Sometimes the glowing path ends in a shower of fragments. Somewhere beyond the towers, however, the clock gives one more faint tick, and Pip gathers the courage to try the passage again. Each attempt becomes another moment in the city's unfinished picture. Reaching the far beacon would mean more than crossing a finish line: it would give Afterglow another morning to hope for.
Gameplay
Your small square runs forward automatically. You decide when it jumps, sending it over sharp spikes and raised obstacles while the track keeps scrolling. Land safely and the run continues; hit a dangerous obstacle and the square bursts into fragments, ending that Normal Mode attempt. Start another attempt, learn the pattern, and work toward the 100% mark that clears the level. The square's forward speed and direction are not yours to change during a run, so timing is the skill to practice.
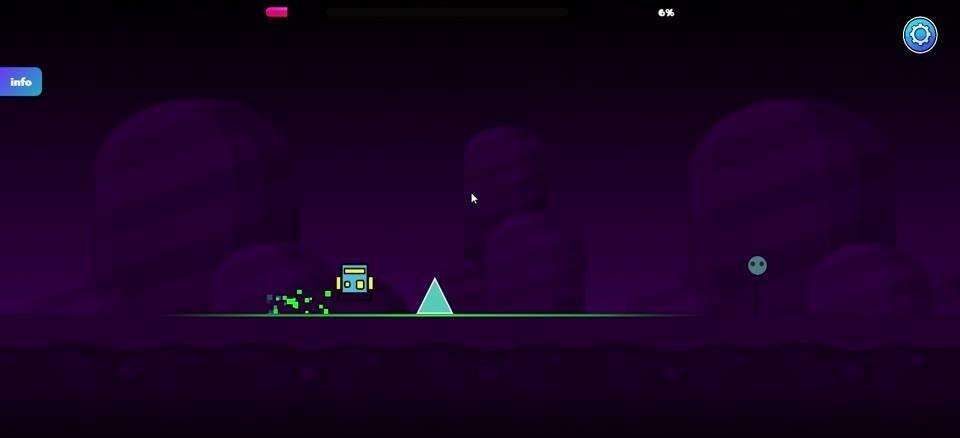
Figure 3. A glowing square follows the green-edged track toward triangular hazards.
Your Square and the Obstacle Course
The player is a compact square with a yellow-green border and a blue patterned center. It tilts as it travels through the air, with little green particles trailing behind. The simple shape is easy to spot against the dark track, which gives you a clear view of where your next jump begins and where the square is headed.
Obstacles come in several shapes. Upright triangles appear in cyan, yellow, and pale gray, while tight clusters of black spikes crowd some gaps. Low purple blocks, taller green-topped columns, and a broad raised wall change the height of the route. These are barriers to get past with well-timed jumps, not objects to collect. For example, when a single spike is followed closely by a tall block, you need to judge the first jump with the second obstacle already in mind.
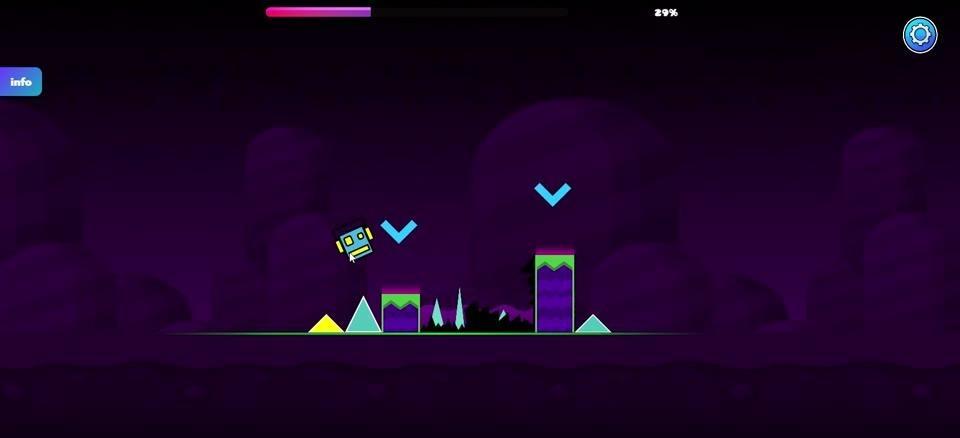
Figure 4. Colored spikes and green-topped purple columns form a tightly spaced obstacle sequence.
Higher sections add an overhead purple structure and a pointed purple-and-green hazard hanging from a cyan chain. The hanging point stays in place, so the challenge is reading the space around it while the square moves forward. When spikes, raised blocks, and a hanging hazard crowd one section, a safe jump needs room both above and below.
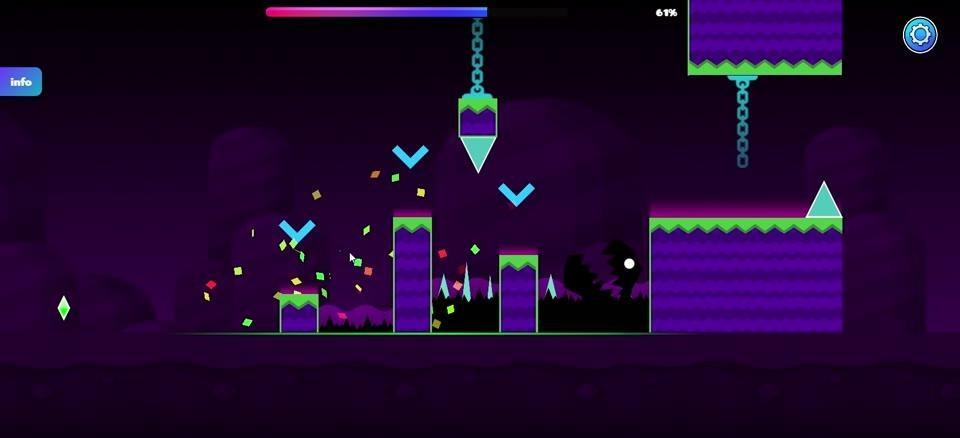
Figure 5. A pointed object hangs from a cyan chain beside high purple structures and ground hazards.
Route Markers and Visual Hints
Bright cyan circles float near the track, and cyan V-shaped marks hover above selected sections of the course. Use these as visual route and position cues while you watch the obstacles themselves. A glowing yellow square set into the floor also marks a point along the route. The bright symbols help break up a crowded scene, making it easier to notice an approaching change in the path.
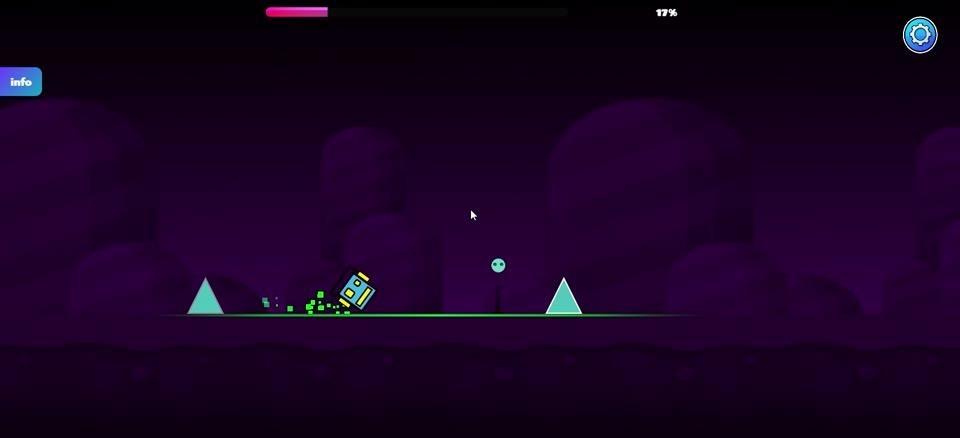
Figure 6. A floating cyan circular marker stands out against the purple course and green track edge.
Progress, Success, and Another Attempt
The slim bar at the top of the screen and its percentage show how far you have progressed through the current level. Reaching 100% means you have completed that level. The percentage is a distance-to-finish guide, rather than a confirmed points formula or combo score. Clearing maps also gives you a reason to revisit the character gallery, where additional looks can become available as new maps open.
A collision that defeats the square ends the current Normal Mode run, and a fresh attempt starts again from the beginning of the level. The on-screen ATTEMPT number counts tries, and you can retry without a fixed attempt limit. A failed run costs the progress of that attempt; it does not consume a limited stock of lives. An advertisement screen may interrupt the return to play after a failure. Practice Mode provides a way to work through difficult stretches and continue after collisions instead of treating each mistake as the end of your practice session.
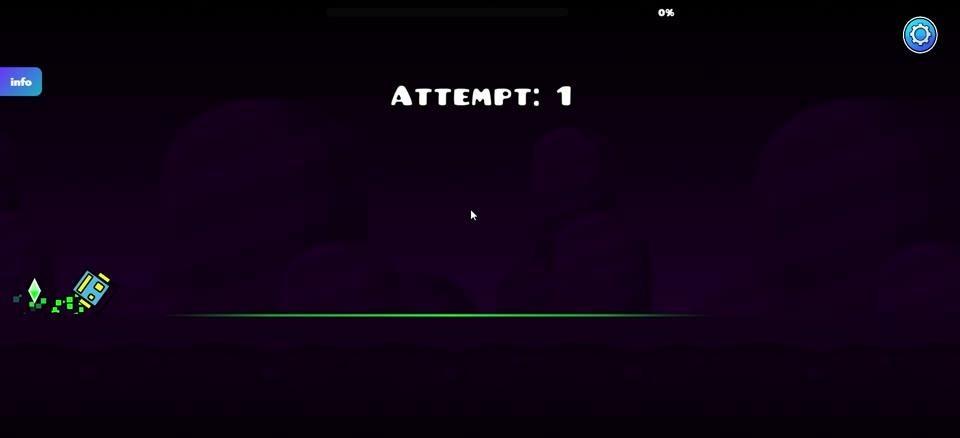
Figure 7. The attempt label appears above a fresh run on the dark purple course.
Character Looks and Useful Menus
The character gallery lets you choose among available square and face designs. A large blue face previews one skin, and nearby icon tiles show other looks; padlocks mark styles that must be unlocked through map progression. The skin changes appearance rather than the jump rules. Round category buttons organize the different character forms, giving you a way to personalize the square you watch during every attempt.
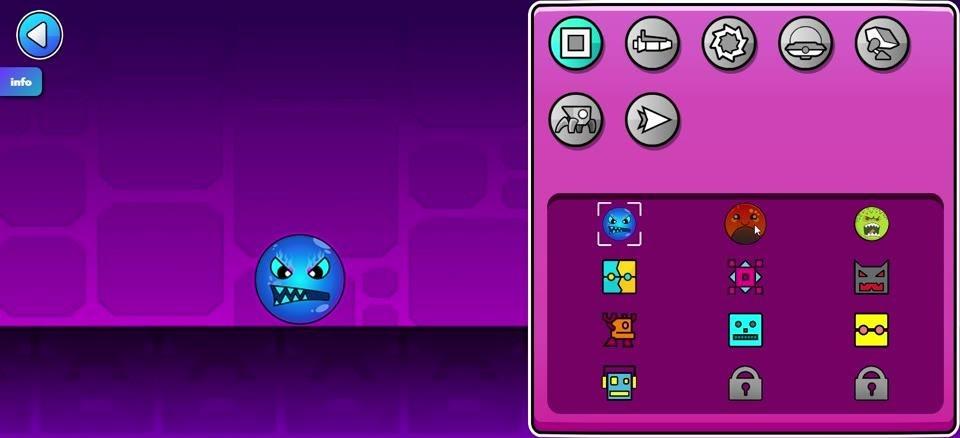
Figure 8. A blue character preview sits beside colorful appearance choices, including locked icons.
A small circular button at the top-right opens Pause. Inside, the central play icon resumes the run, a circular arrow starts it over, and a menu icon returns to menu navigation. The panel also shows Music and Speed sliders, a Practice Mode setting, an Auto-Retry option, and a Progress Bar option, alongside Normal Mode and Practice Mode progress displays. These settings let you choose how to approach repeated attempts while keeping the main jump action simple.
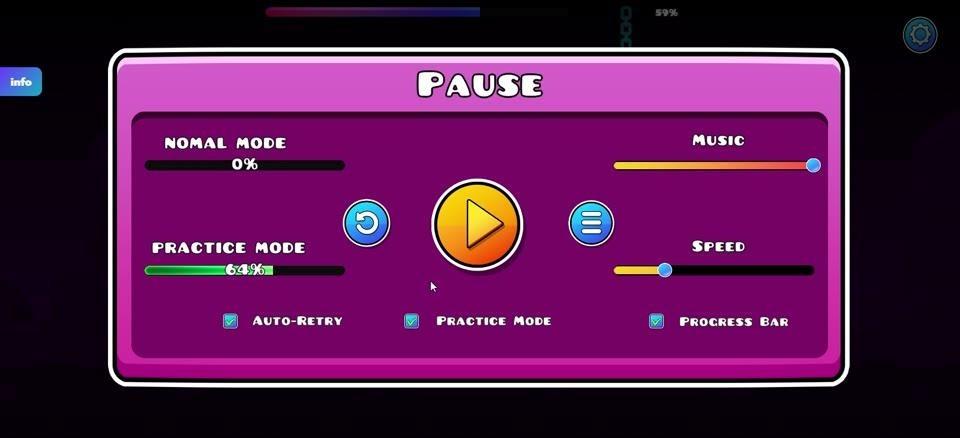
Figure 9. The purple Pause panel contains resume and restart buttons, sliders, and run options.
Visual Style
Geometry Dash World puts brilliant arcade colors against a deep violet night. Rounded rock-like silhouettes recede behind the track, while bright green edges define the ground and the tops of purple structures. The little square glows against this darker backdrop, and its flecked trail makes its movement easy to follow. Spikes use contrasting colors and sharp outlines so their shapes remain readable as they approach.
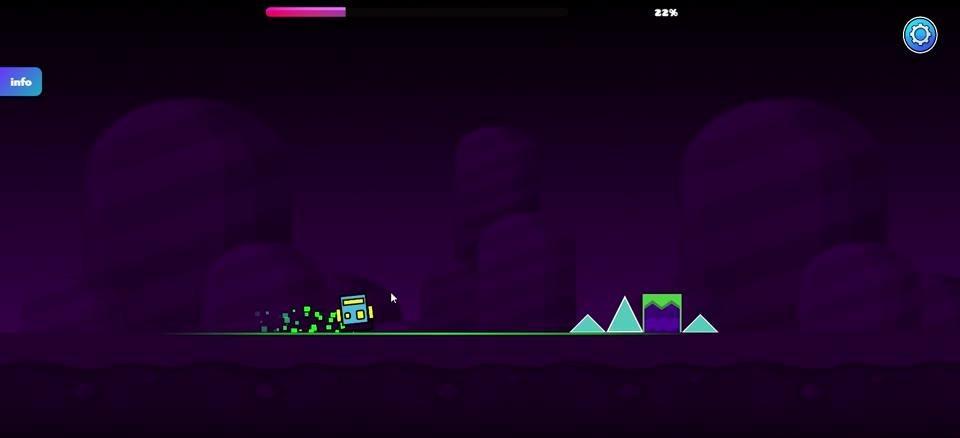
Figure 10. A bright square, sharp colored spikes, and layered violet scenery define the neon course.
The visual contrast gets especially useful when a scene grows busy. Cyan route marks sit apart from green platform edges, and a pink-to-blue progress display gives the eye a stable reference above the moving action. Menus follow the same playful palette, with pink borders, purple panels, and large colored icons. Every screen looks part of the same energetic world, even when the action briefly stops.
Standout Features
The main challenge is built around one immediate decision: when to jump. Since the square moves forward on its own, you can focus on the next spike, the space beyond it, and the rhythm of your attempts. The colorful hazard mix, visible level percentage, unlimited retries, and Practice Mode make it easy to recognize small improvements even before you clear the whole course.
Players who know The Impossible Game will recognize the appeal of guiding a cube past spikes with a minimal input scheme; that earlier title is a one-button platformer built around spikes and pits. [7] Our game puts its own emphasis on the neon purple route, tall green-edged structures, cosmetic character choices, and an always-visible percentage toward a level clear. It is a useful comparison of play challenges, not a claim about how our game was originally conceived.
BIT.TRIP RUNNER offers another genre point of reference as an arcade-style rhythm game. [8] Geometry Dash World keeps its focus on a small jumping square and the hazards directly in its path. Quick retries let you notice an obstacle pattern, try a new jump moment, and see whether the progress bar moves farther. Visit slope3.com to play Geometry Dash World and put your own sense of timing to the test.
Controls
PC: Mouse
1. Open a level and locate the small square moving automatically along the bottom track.
2. Left-click while the level is running to make the square jump. Click at the right moment to clear the spike or raised obstacle ahead.
Mobile: Touchscreen
1. Open a level and watch the square advance along the track on its own.
2. Tap the play area to jump. Time each tap before an approaching hazard so the square passes over it.
References
[1] Chronophotography. https://en.wikipedia.org/wiki/Chronophotography
[2] Eadweard Muybridge. https://en.wikipedia.org/wiki/Eadweard_Muybridge
[3] Étienne-Jules Marey. https://en.wikipedia.org/wiki/%C3%89tienne-Jules_Marey
[4] Stroboscope. https://en.wikipedia.org/wiki/Stroboscope
[5] Neural mechanisms of visual motion extrapolation. https://doi.org/10.1016/j.neubiorev.2023.105484
[6] Motion behind occluder: Amodal perception and visual motion extrapolation. https://doi.org/10.1080/13506285.2021.1943094
[7] The Impossible Game. https://en.wikipedia.org/wiki/The_Impossible_Game
[8] Bit.Trip Runner. https://en.wikipedia.org/wiki/Bit.Trip_Runner
Image Credits
Muybridge horse jumping.jpg - Eadweard Muybridge - publicdomain. https://commons.wikimedia.org/wiki/File:Muybridge_horse_jumping.jpg
Muybridge Buffalo sequence.jpg - Eadweard Muybridge - publicdomain. https://commons.wikimedia.org/wiki/File:Muybridge_Buffalo_sequence.jpg